Step 1: Log in to your account.

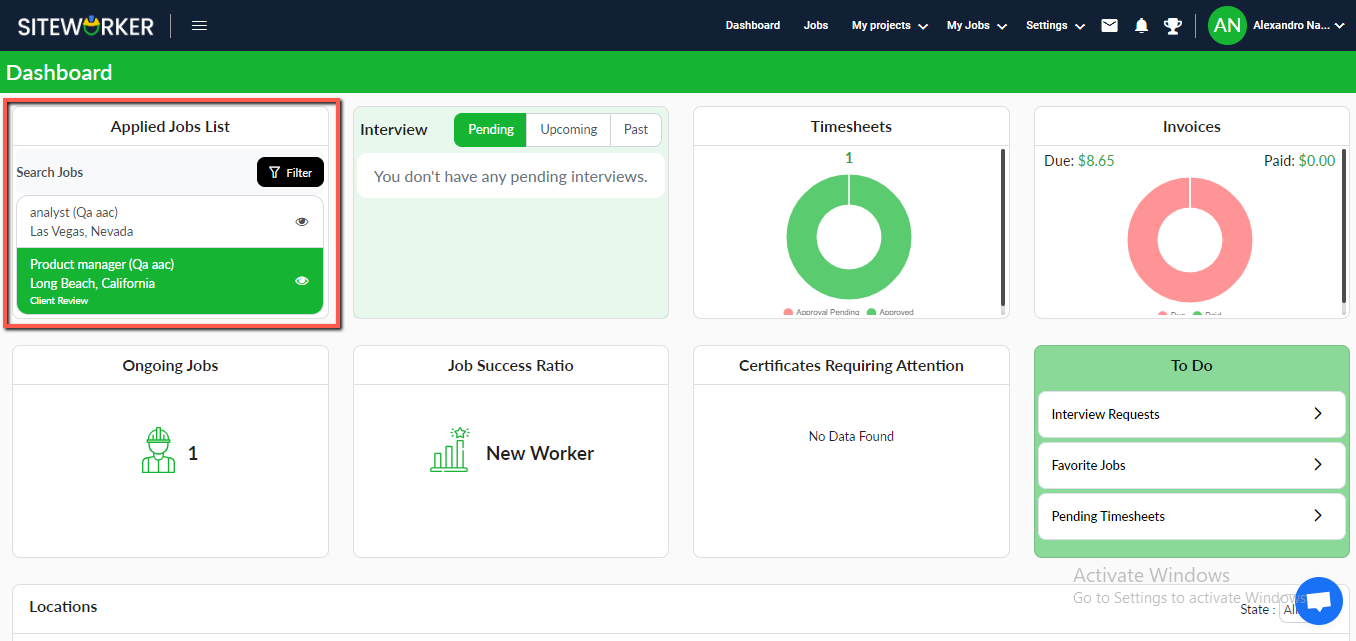
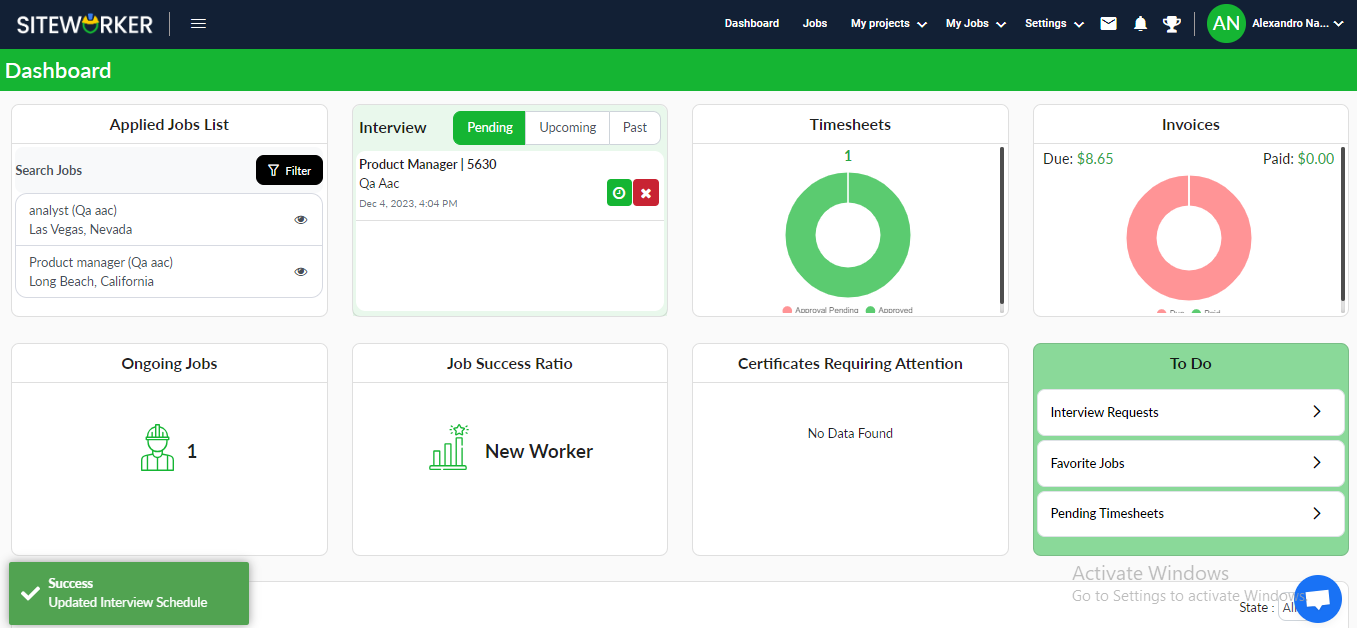
Step 2: View applied jobs in the “Applied Jobs List” section.
– Click on the eye icon to view job details.
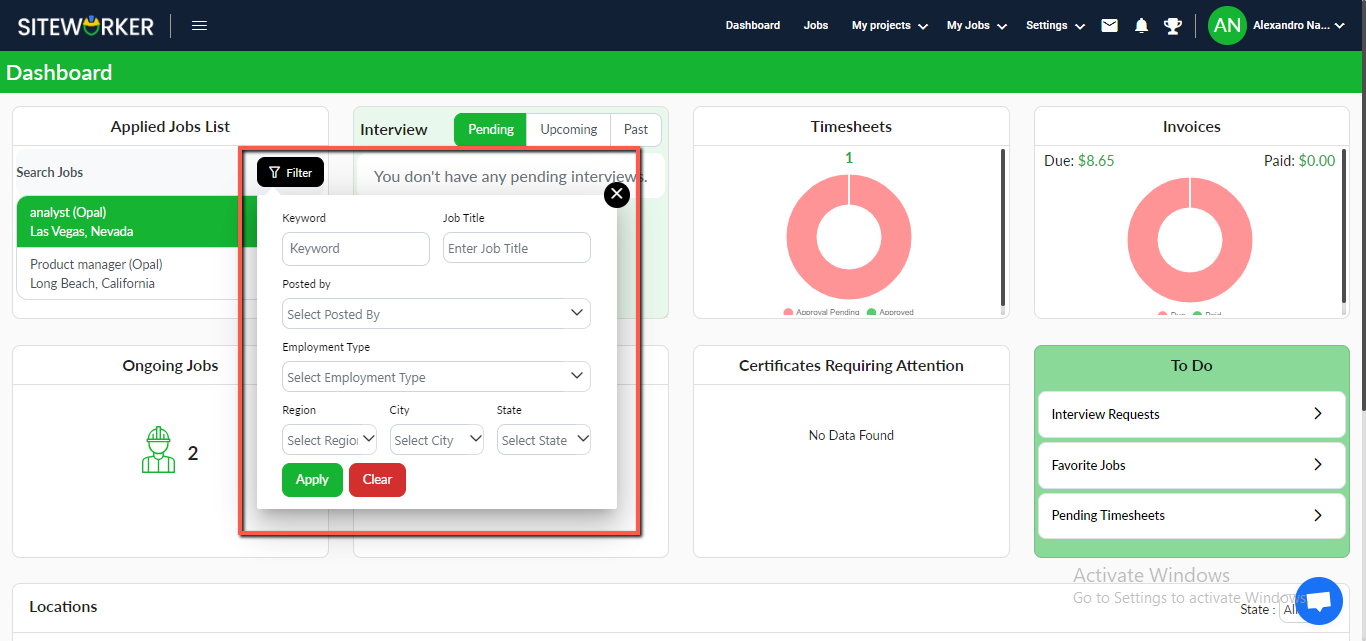
– Click on the Filter button to search the jobs.
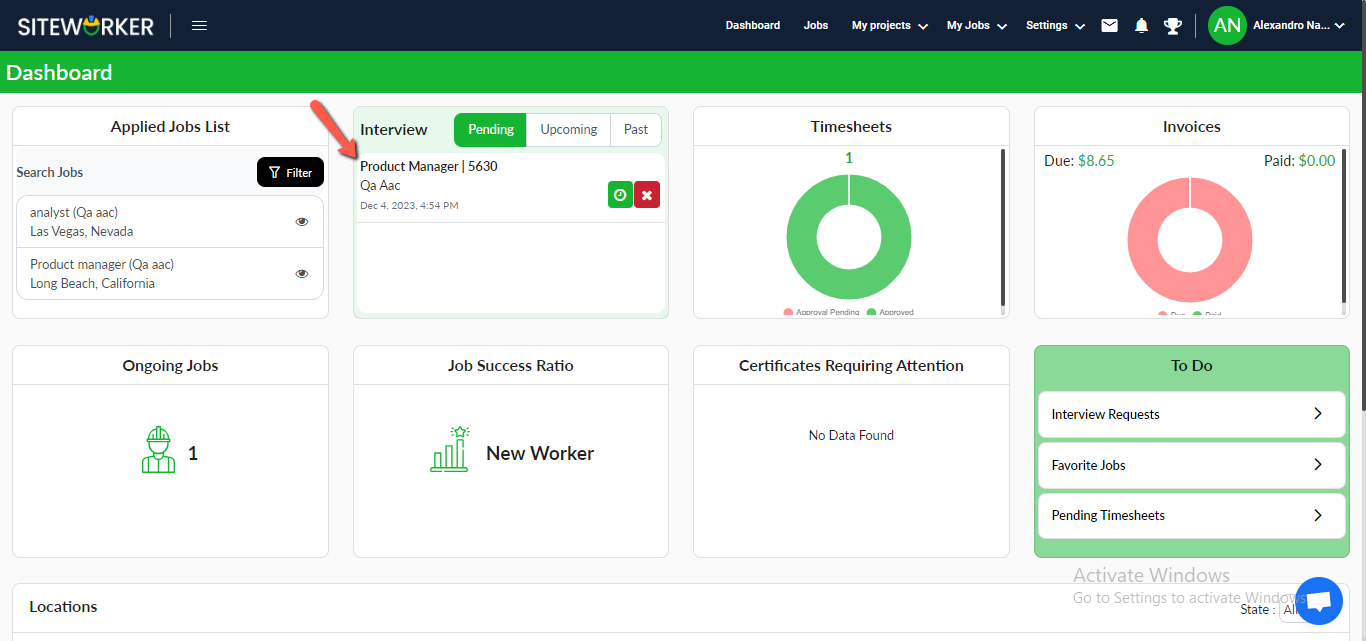
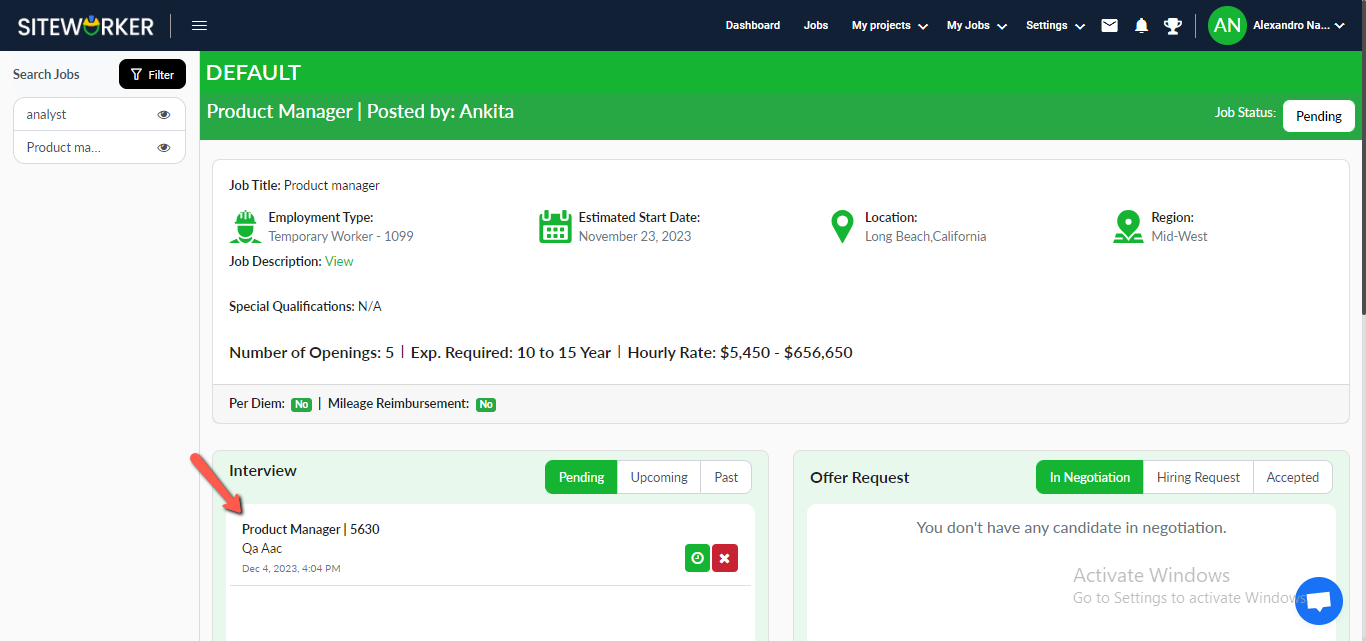
Step 3: Go to the Pending tab to view all scheduled interviews, with Schedule and Reject buttons
Step 4: Click on the “Reschedule” button and a pop-up form will appear.

– Schedule the interview and you’ll see the following message on your screen.
– The same thing happens on the particular job detail page under the Interview section.
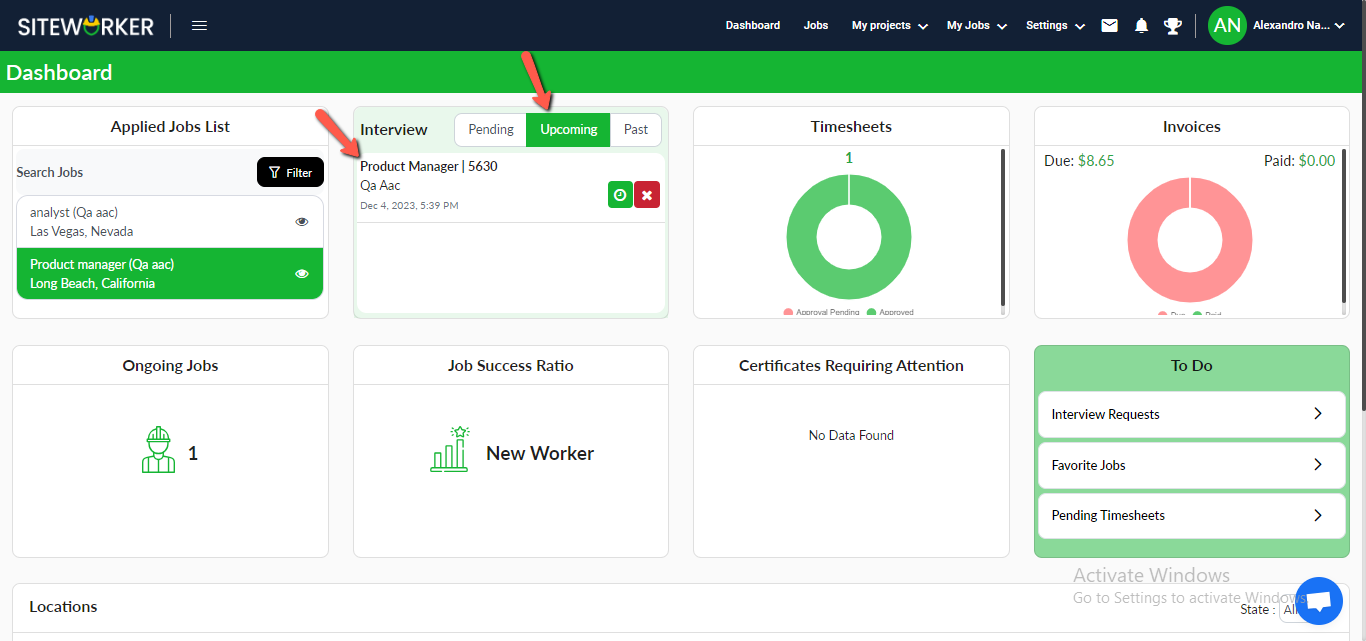
Step 5: After accepting the schedule from the client, the worker detail will be moved to the “Upcoming” tab.
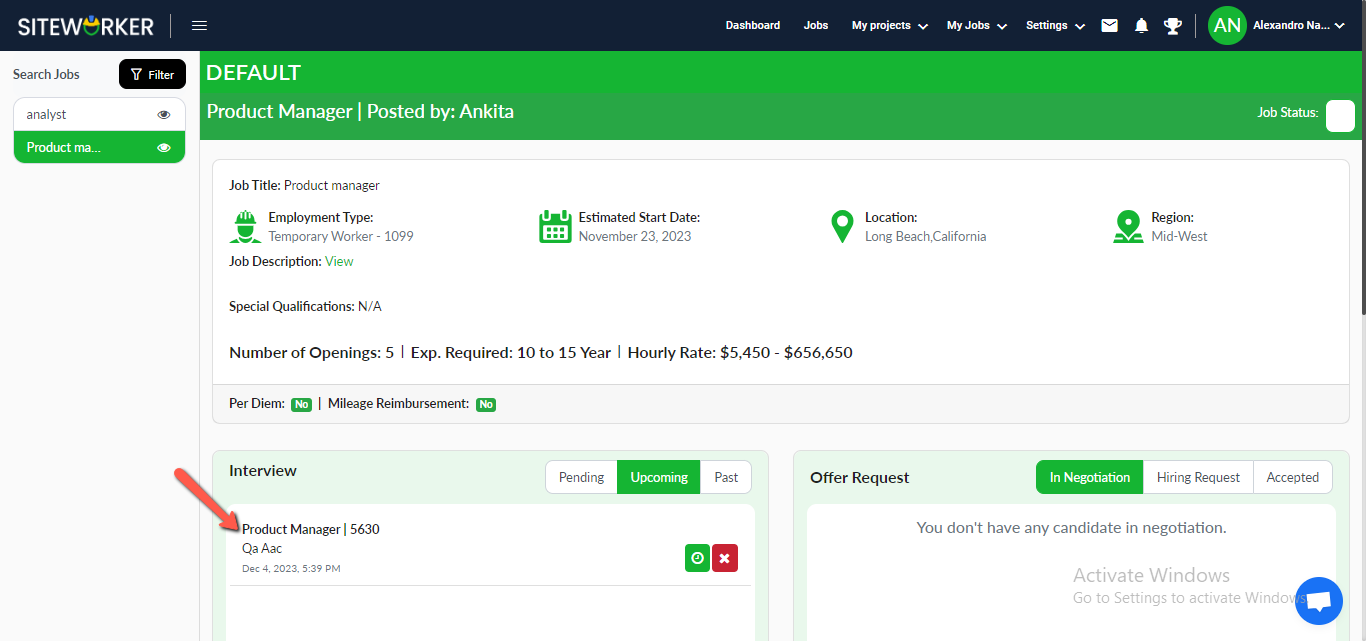
– On the “Upcoming” tab of the job details page, you’ll find the same information. You can manage it directly from the job detail page.
Step 6: The client creates an offer and the worker detail is moved to the offer section in under the “In Negotiation” tab.
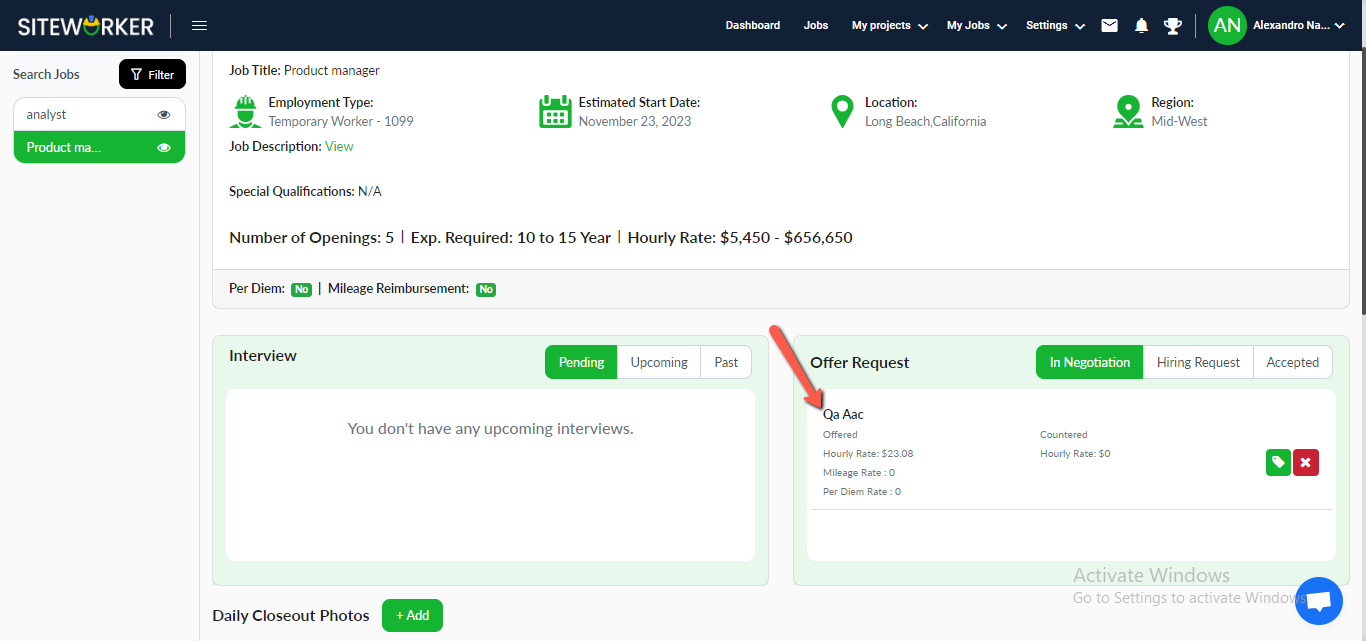
Step 7: Click on the Counter Offer button to give a counter offer or reject the offer by clicking on the Reject Bbutton.
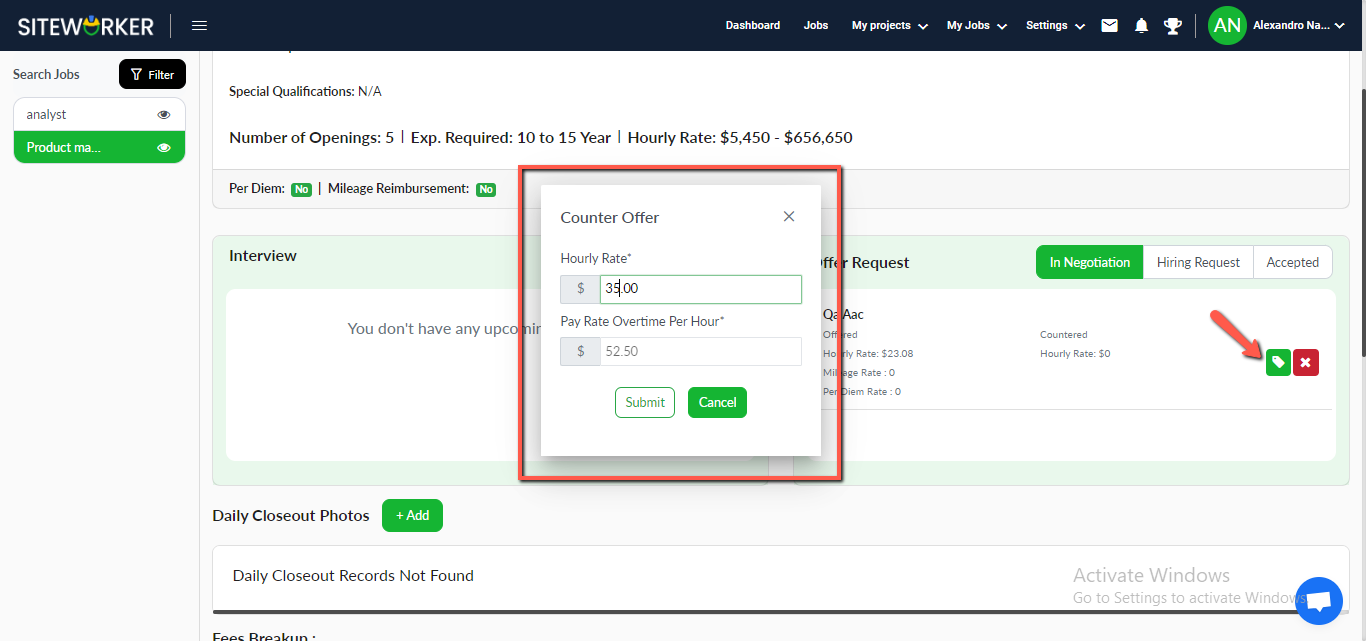
Step 8: Click on the offer button and add a rate in the pop-up form
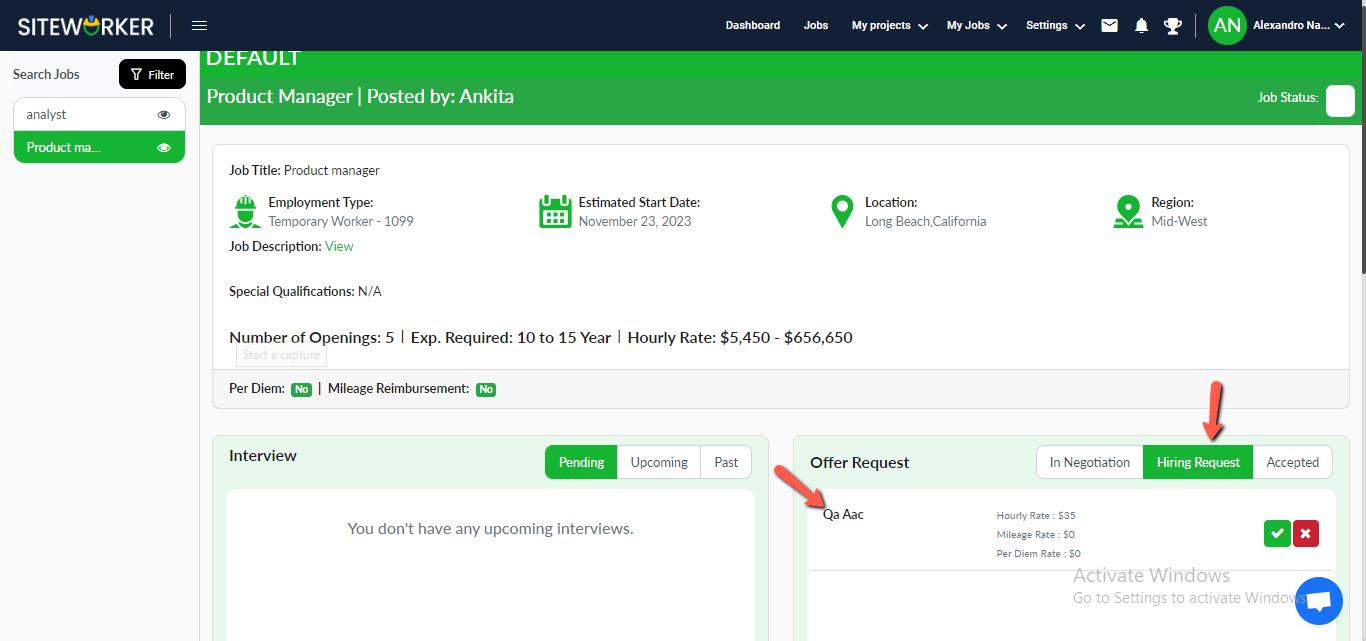
Step 9: Submit a counter offer, and the job will be moved to the “Hiring Request” tab. Now you can accept and reject the job.
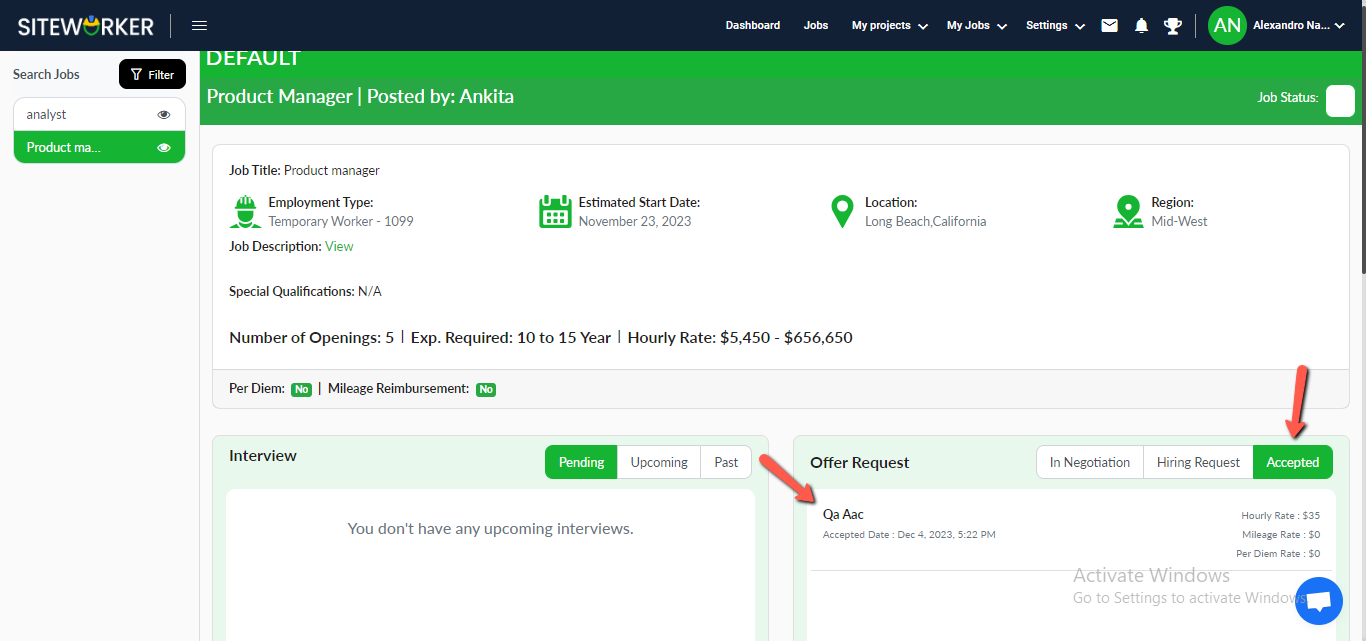
Step 10: Once the hiring request is accepted, the job details will be moved to the “Accepted” tab.
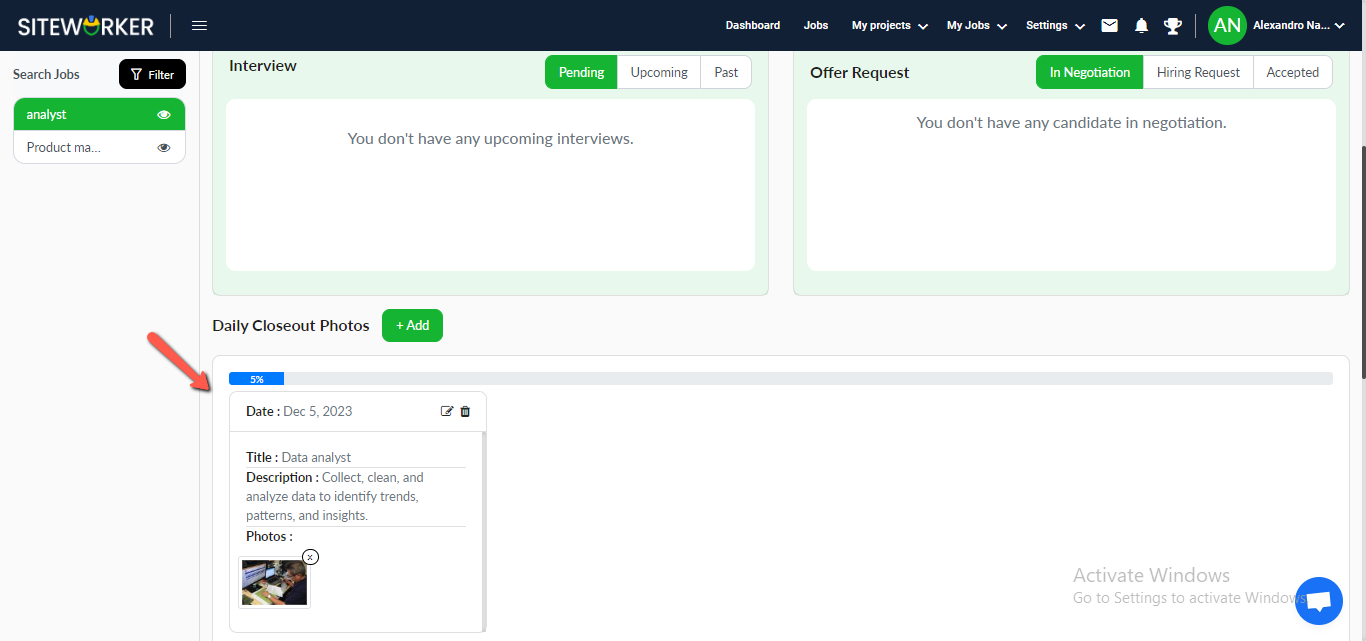
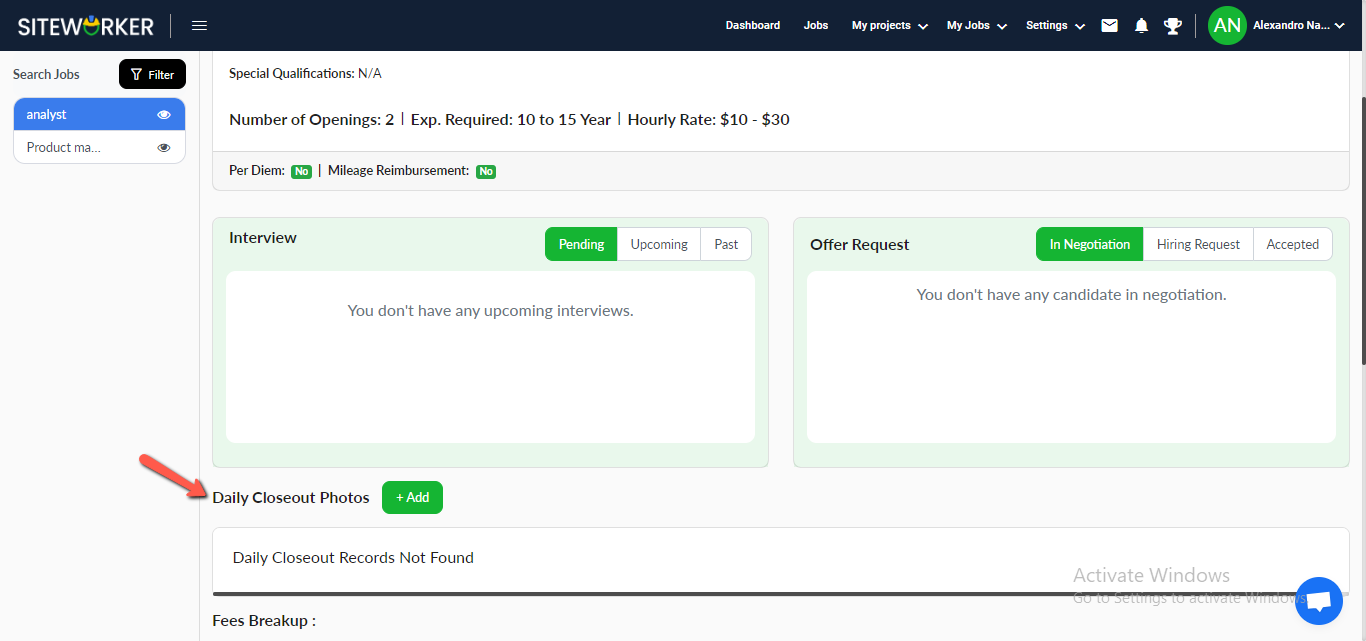
Step 11: Click on + Add button to add Daily closeout photos.
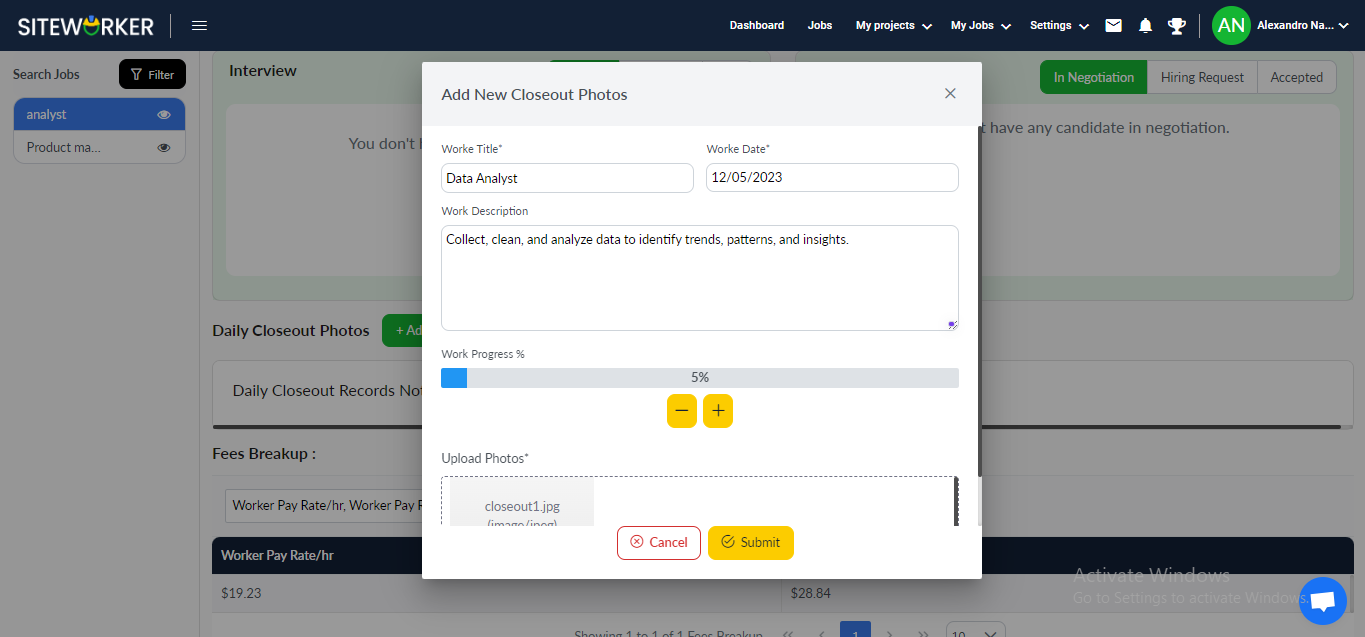
– You’ll see the “Add New Closeout Photos” pop-up form:
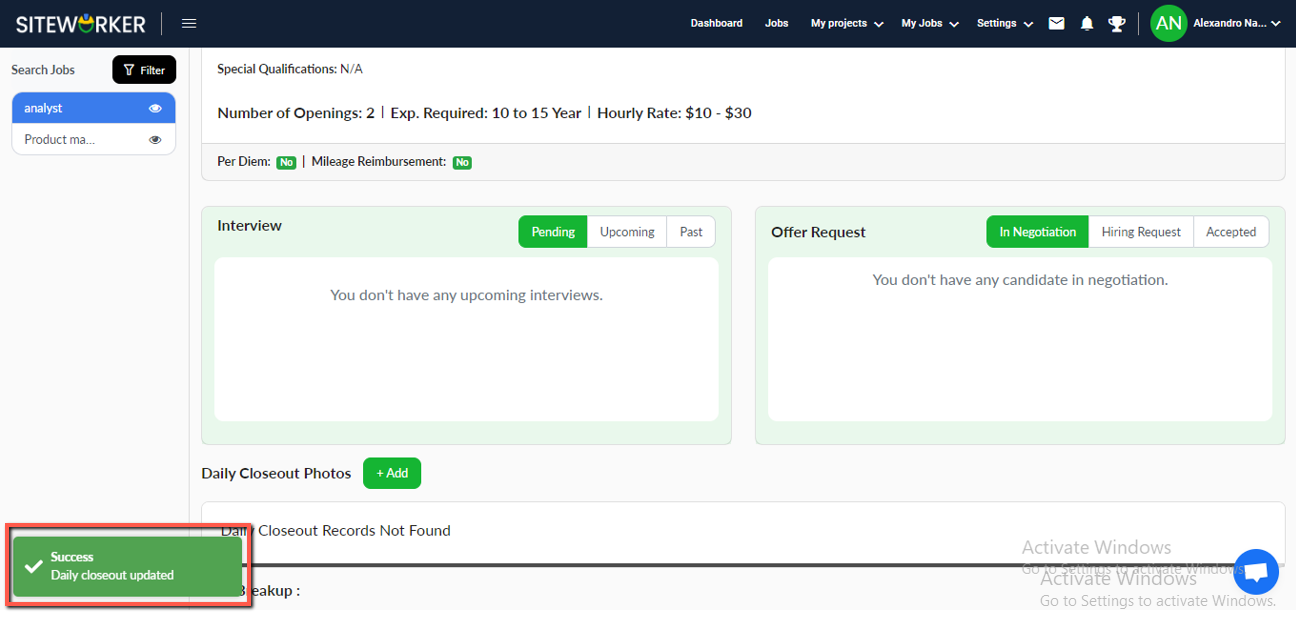
– The following message will appear on your screen.
– Daily Closeout Photos will be listed with process on the Daily closeout photos section.